This guide uses pelvic floor exercises for women as the starting point for the practical advice below. Pelvic floor exercises for women are a practical way to support everyday comfort, body awareness, and confidence. This guide brings those exercises into a simple routine, with step-by-step form cues, breathing patterns, and everyday habits that help you practice consistently and safely. It focuses on gentle skills you can apply at home, uses plain language, and emphasizes comfort-first choices. If anything feels uncomfortable, or if you have questions about what’s right for you, consider speaking with a qualified clinician for personalized guidance.
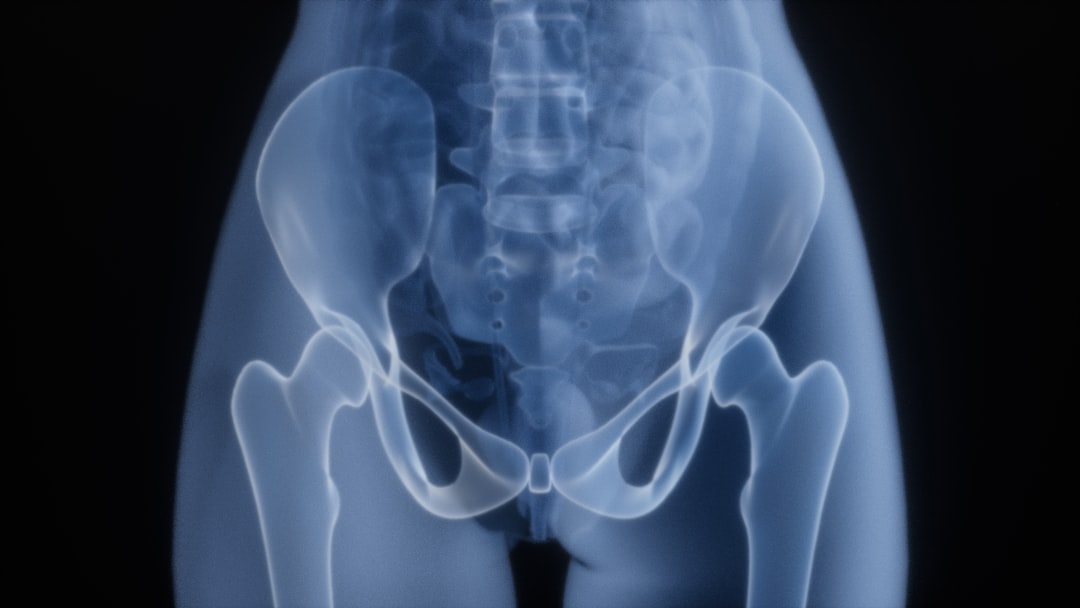
pelvic floor exercises for women: Why the pelvic floor matters in daily life
Your pelvic floor is a group of muscles and connective tissues at the base of your torso. These muscles contribute to posture, stability, and day-to-day comfort during activities like walking, lifting, laughing, and even breathing. When they coordinate well with your breath and core muscles, everyday tasks often feel steadier and more comfortable. When they are tense or underused, you might notice fatigue, low back discomfort, or that certain movements feel less supported than you’d like.
Think of the pelvic floor as part of a “team” with your diaphragm (for breathing), deep abdominal muscles (for trunk support), and hip muscles (for movement). This team relies on timing more than strength. A smooth inhale tends to encourage softening and length, while a quiet exhale supports a gentle lift. Many people find that paying attention to this rhythm helps daily tasks feel easier—standing up from a chair, picking up a child, carrying groceries, or going for a stroll. The goal of exercise isn’t to clamp or brace all day; it’s to restore coordination so the area can relax, recoil, and engage as needed.
There’s no single “perfect” way to practice. Comfort-first choices generally work best: short sessions, small efforts, and positions that feel easy to maintain. Over time, the combination of breath, posture, and gentle lifts can build body awareness without strain.
Pelvic floor basics: anatomy in everyday language
Imagine a soft hammock at the base of your torso, anchored to the sit bones and tailbone. That hammock is your pelvic floor. When you inhale, the hammock subtly lengthens downward as your diaphragm descends; when you exhale, it recoils upward. This spring-like action is normal and helpful. Rather than thinking about intense squeezing, picture modest motion and timing. Three principles will guide your practice:
- Coordination beats constant grip: The pelvic floor works best when it can both relax and gently engage. Constant bracing can make movements feel rigid and tiring.
- Breath leads the way: Inhaling tends to encourage softening; exhaling supports a subtle lift. Use this pattern in every exercise.
- Neutral alignment helps: Stacked ribs over pelvis, relaxed neck and jaw, and soft knees help the pelvic floor move comfortably with your breath.
Many people require a week or two to sense these muscles clearly. That’s normal. You can build awareness with simple cues, such as visualizing the space between the sit bones gently drawing up on the exhale, then settling on the inhale. If a cue doesn’t make sense at first, switch to another. The images of a parachute, hammock, or tissue rising through a straw are all common ways to describe the subtle lift.
Breath and posture: your built-in coaching tools
Breathing is your simplest tool. Place one hand on your lower ribs and one hand on your lower belly. Try this pattern for a minute or two to find your rhythm:
- Soft inhale through the nose: Let the lower ribs widen gently. Imagine your pelvic floor lengthening like a parachute expanding downward.
- Quiet exhale through the mouth: Let the ribs glide inward and the belly draw gently toward the spine; feel a light recoil or lift under the pelvis.
- Relax between rounds: After a few breaths, shake out your shoulders or wiggle your toes to avoid over-focusing.
Combine your breath with posture. Try standing with feet hip-width apart. Keep your knees soft, ribs stacked over the pelvis, and head balanced—not pitched forward or tilted back. Think “tall through the crown of the head,” not rigid. In seated practice, sit on the front of a firm cushion with your sit bones grounded. In either position, let your neck and jaw stay relaxed—tense jaws often translate to tense pelvic floors.
If you’re using a mirror, check that your shoulders aren’t creeping up. If you’re practicing without a mirror, imagine holding a light paperback book on your head—steady and centered, not stiff. Return to the breath when in doubt; your breath will cue the timing of each gentle lift and release.
Pelvic floor exercises for women: beginner essentials
This section offers a concise set of beginner moves that build awareness and coordination. Focus on small effort, consistent practice, and smooth breathing. If any position feels uncomfortable, modify or skip it and revisit later.
1. Breath-led gentle lift
Setup: Sit or lie down comfortably with knees bent and feet on the floor. Place one hand on your lower ribs.
Cue: Inhale softly; on the quiet exhale, imagine a light lift under the pelvis—as if gently drawing a tissue upward through a straw. Hold just for the end of the exhale, then release as you inhale.
Reps: 8–10 cycles. Rest as needed.
2. Side-lying lengthen and lift
Setup: Lie on your side with a pillow between your knees. Align your head, ribs, and pelvis.
Cue: Inhale to feel a gentle lengthening; exhale to imagine the hammock recoiling upward. This side position can help some people feel the recoil more clearly.
Reps: 8–10 cycles per side.
3. Seated sit-bone awareness
Setup: Sit at the front of a firm cushion. Gently rock forward and back to sense your sit bones.
Cue: On the exhale, picture the space between the sit bones drawing up and in; on the inhale, let it settle. Keep shoulders relaxed.
Reps: 8–10 cycles.
4. Standing sway with breath
Setup: Stand with feet hip-width apart, knees soft, ribs stacked over pelvis.
Cue: Inhale and sway gently toward your heels; exhale and return to center while imagining the light upward recoil. This helps connect balance with pelvic awareness.
Reps: 8–10 cycles.
5. Gentle bridge with band (optional)
Setup: Lying on your back, place a light resistance loop around your knees. Feet hip-width apart, arms by your sides.
Cue: Inhale to settle; on the quiet exhale, press lightly out against the band while lifting hips a few inches. Sense a soft pelvic recoil. Lower on the next inhale.
Reps: 6–8 cycles. Stop well before fatigue; a small lift is enough.
A 10-minute daily routine you can keep
Consistency matters more than intensity. Here’s a simple, repeatable routine you can complete in about 10 minutes. It pairs breath with gentle engagement, alternating positions to build awareness from different angles.
- Minute 0–2, warm-up breath: Seated, hand on ribs, soft inhale/quiet exhale, 10 cycles. Neck and jaw relaxed.
- Minute 2–4, gentle lift in supine: On exhale, lightly lift; on inhale, release. 10 cycles.
- Minute 4–6, side-lying variation: 8–10 cycles each side; use a pillow between knees.
- Minute 6–8, seated sit-bone awareness: 8 cycles; visualize the hammock drawing up on the exhale.
- Minute 8–10, standing sway: 8 cycles; sway back on inhale, center with a light recoil on exhale.
End with two relaxed breaths, shoulders down, jaw soft. If you miss a day, simply start again. Aim for three to five sessions per week, and feel free to shorten to five minutes on busy days. The goal is to make it a habit rather than a chore.
Progressions and variations: build skill, not strain
Once the basics feel familiar, you can explore light progressions. The purpose is to improve coordination and awareness, not to chase maximum effort. Increase gradually and keep the breath calm.
- Shorter holds, smoother rhythm: Try mini-holds at the top of your exhale for one to two seconds, then release fully on the next inhale. This adds timing practice without intensity.
- Different bases of support: Practice seated on a firm surface, then on a softer cushion, then in standing. Each surface changes the feedback you feel.
- Coordinated hip work: Add gentle bridges (lifting the hips slightly on the exhale) while maintaining attention on the soft lift under the pelvis.
- Walking awareness: During a short walk, pair steps with breath: inhale for two steps, exhale for two steps, feeling the recoil on the exhale. Keep shoulders relaxed.
- Light resistance: Use a light loop around your knees during bridges to encourage outward hip engagement in sync with the breath.
- Position variety: Explore tall kneeling on a cushion, quadruped (hands and knees), and supported wall sits. Each position offers a new perspective on breath and recoil.
For a structured approach, consider a simple four-week practice path. Weeks 1–2: daily breath awareness with beginner lifts, five to ten minutes. Week 3: add mini-holds and one new position. Week 4: include a short walk with breath timing and a gentle hip-bridge set twice per week. Keep notes on what felt clear and what felt fuzzy; practice the clear cues more often.
Everyday habits: align common activities with gentle cues
Small, steady habits help you practice without adding time to your schedule. These ideas turn ordinary moments into quiet coaching sessions:
- While brushing your teeth: Stand tall, soften your knees, and practice two to three soft inhale/quiet exhale cycles.
- When lifting groceries: Exhale during the lift to sync a subtle recoil with the movement; keep the load close to your body and avoid twisting quickly.
- During desk breaks: Sit forward on your chair, find your sit bones, and practice three exhale lifts, releasing completely on the inhale.
- In the kitchen: While waiting for water to boil, try standing sway with breath—a few cycles add up over the week.
- Before walks: Warm up with three gentle breaths to help your ribs, diaphragm, and pelvic floor move together.
- Phone posture: Hold the screen at eye level for a minute or two while you practice soft inhale/quiet exhale; this helps avoid upper-back rounding and jaw tension.
Your environment can help too. A supportive chair with your hips slightly above your knees, a footrest if needed, and a monitor at eye level all make neutral alignment easier. If you’re often on your phone, bring the screen up to eye level to avoid rounding your upper back and shifting your rib position. Small posture tweaks reduce unnecessary strain and make your breath mechanics more natural.
Comfort across life stages: pregnancy, postpartum, and midlife
Pelvic floor routines can be adapted to different phases of life. The goals remain the same—gentle coordination, breath-led engagement, and comfort. This section offers general education for daily routines. If you have questions about your situation, consider personalized guidance from a professional who focuses on pelvic and core care.
Pregnancy
Focus on breath awareness and comfortable positions. Many people find side-lying and seated work more pleasant in later months. Use extra pillows for support, and shorten hold times to keep the effort subtle. Practice visualizing length on inhale and a soft recoil on exhale. If anything feels uncomfortable, pause and choose a different position or take a longer rest.
Postpartum
Start with very light, breath-led work and emphasize rest. Think of the exercises as a way to reconnect with your core system—diaphragm, deep abdominals, hips, and pelvic floor. Short sessions (one to three minutes) sprinkled through the day may feel more approachable. Respect your energy and gradually rebuild consistency rather than intensity.
Midlife and beyond
Comfortable movement and breath coordination remain central. If your schedule is full, keep to five-minute sessions scattered across the day. The routine here is flexible and can be adjusted around your commitments: shorter holds, fewer repetitions, and more frequent breaks are all valid choices. Add posture-friendly habits—like soft knees when standing and avoiding jaw clenching—to keep the area feeling calm.
Common mistakes and gentle fixes
Everyone learns at their own pace. The following frequent snags have simple solutions. Each fix nudges your practice back toward comfort and consistency.
- Holding your breath: If you notice breath-holding, slow down and shorten hold times. Say “exhale, lift, release” out loud to guide the rhythm. You can also count “in for two, out for two.”
- Over-squeezing: A strong squeeze can make the area feel fatigued or tense. Replace it with the image of a soft tissue lifting under the pelvis; aim for ease and timing, not force.
- Jaw and shoulder tension: Relax your jaw and drop your shoulders before each set. Gentle neck circles and a soft smile can help reset muscle tone.
- Rigid posture: Neutral alignment isn’t a statue. Keep the stance tall but relaxed; micromovements are fine. Unlock your knees and let your ribs hover over the pelvis.
- Rushing progress: More effort isn’t better. Progressions should feel smooth, with normal breathing and no strain. If it feels like too much, return to earlier variations.
- Practicing only one position: Changing positions teaches your body new cues. Rotate between seated, side-lying, standing, and tall kneeling across the week.
If you’re practicing regularly but unsure about form, consider a short session with a qualified professional who can observe your posture and breath patterns. A single set of eyes can help you fine-tune quickly and comfortably.
Helpful tools and accessories
Tools are optional. Start with your body, breath, and a supportive surface. If you enjoy accessories, consider these:
- Yoga mat or firm cushion: Provides consistent feedback in seated and supine positions. A firm surface helps you sense your sit bones and rib motion.
- Pillows and towels: Offer support in side-lying or seated variations. Place a pillow between knees in side-lying to keep hips comfortable.
- Light resistance band: Encourages hip engagement during bridges. Select the lightest resistance to keep effort gentle.
- Timer or app: A two-minute timer helps you keep sessions short and focused. Set reminders at times when practice feels easiest for you.
- Notebook: Jot down which positions felt clearest and what cues clicked. Repeat those more often; skip what felt confusing.
If you explore biofeedback devices, approach them as learning aids rather than pass/fail tests. Use them to notice trends: does your breath feel smoother when you sit on a firm chair versus a soft couch? Do mini-holds feel easier early in the day? These observations guide your routine without pressure.
Align your space and schedule for consistency
Consistency improves body awareness. Set up small reminders and gentle cues so sessions happen without a lot of decision-making:
- Place a cushion where you sit: Seeing your cushion makes it easy to do 60 seconds of breath work before meetings.
- Stack with habits: Pair practice with tasks you already do—like morning coffee or evening reading. One minute before or after a normal task can anchor your routine.
- Use micro-sessions: Two or three minutes count. Many short sessions can be easier than one long block.
- Celebrate small wins: Note the days you practiced, however briefly. Encouragement tends to build momentum.
- Choose your best time: Some people feel clear awareness in the morning; others prefer late afternoon. Pick the time that fits your energy.
Think of this as building a personal toolkit. Over time, you’ll notice which positions and cues feel most helpful. Keep those in the routine; let go of what doesn’t serve you. If you want more resources or gentle program ideas, you can browse women’s wellness materials on our site at camchealth.com.
Frequently asked questions (and calm answers)
How hard should the exercises feel?
Light to moderate. You’re practicing coordination rather than maximal strength. If you can breathe smoothly and talk, you’re likely in the right effort zone. If you feel tension in the jaw, neck, or glutes, scale back and return to breath-led cues.
Can I practice daily?
Yes, especially with short sessions. Many people do well with three to five days per week, but daily two-minute micro-sessions also work. Let your schedule guide you, and stop if your body asks for rest.
What if I don’t feel anything?
That’s common at first. It can take a week or two to sense a coordinated lift and release. Try different positions—supine, side-lying, seated—and keep your focus on a calm breath, soft jaw, and stacked posture. Visualization may help: picture a gentle hammock moving with your breath.
What’s the difference between a gentle lift and a squeeze?
A gentle lift feels like a subtle upward motion under the pelvis during an exhale. A strong squeeze often recruits surrounding muscles and can feel rigid. Aim for the lighter sensation and an easy release on inhale.
Can I combine these exercises with other routines?
Absolutely. Pair them with walking, light strength work, or yoga. Keep the breath in sync across activities and prioritize comfort. You can also add hip mobility or core stability drills, keeping intensity low while you learn new cues.
How do I know if I’m improving?
Look for simple signs: smoother breathing rhythm, less jaw or shoulder tension when you practice, easier balance during standing sway, and a sense that the area under the pelvis can both relax and lightly lift on cue. Your notes can reveal progress—what once felt fuzzy now feels clear.
Self-check cues: noticing progress without pressure
Progress can be subtle. Use these self-check cues once or twice per week to notice changes without turning practice into a test.
- Breath rhythm check: Sit comfortably and count your inhale for two seconds, exhale for two seconds, for one minute. If you maintain steady timing without jaw or shoulder tension, coordination is on track.
- Standing sway balance: Stand hip-width, knees soft. Inhale and gently sway toward your heels; exhale and return to center. If this feels smooth and grounded, your posture and breath are syncing well.
- Mini-hold clarity: During an exhale, add a one-second pause at the top of your gentle lift, then release fully on the inhale. If the pause stays soft and unforced, you’re building timing skill.
- Position variety: Try the same cues in seated, side-lying, and standing. If you can sense a gentle lift across positions, your body awareness is expanding.
These checks do not require intensity or long sessions. They’re quick signals that coordination and comfort are progressing quietly in the background.
Integrating pelvic awareness with walking, strength, and yoga
Once breath cues and gentle lifts are familiar, integrate them into everyday movement. The aim is to keep the area responsive, not braced, while you move through common activities.
- Walking: Pair breath with steps—inhale for two steps, exhale for two steps. During exhale, imagine a light recoil without gripping. Keep arms swinging loosely and shoulders relaxed.
- Strength basics: In bodyweight squats, hinge at the hips and keep ribs stacked. Exhale during the upward phase, sensing a gentle recoil; inhale on the way down with soft length. Use small ranges of motion at first.
- Yoga flows: In cat-cow, inhale as the diaphragm descends and the pelvic floor lengthens; exhale to feel a light lift as the spine rounds. In bridge poses, combine the exhale with a small hip lift and the inhale with a release.
- Stairs and daily lifts: Exhale to step up or stand, keeping your neck and jaw soft. Hold objects close to the body to reduce strain and allow breath-led timing.
Integrating pelvic awareness should feel straightforward, not forced. If you lose the cues during a busy task, let it go and revisit later with a simple seated breath set.
Modifications for comfort and unique scenarios
Everyone’s experience is different. Adjust positions and cues to fit your comfort and routines. Here are common scenarios and simple modifications that keep practice approachable.
- Sensitive hips: Use more pillow support in side-lying and avoid deep hip flexion. Try tall kneeling on a cushion to practice breath without pressure on the hips.
- Busy schedule: Favor micro-sessions—one minute of breath-led cues before you open your laptop and another minute when you close it. Two or three short sessions often add up quickly.
- Travel days: Seated breath sets in a car or on a plane can be as simple as “inhale-soften, exhale-lift” for five rounds. Rest your elbows on the armrest to keep shoulders down.
- Floor practice isn’t available: Build standing variations: soft-knee stance, wall-supported mini-squats, and standing sway. Practice in socks on a firm surface for clear feedback.
- Distraction: Use a single cue per session—either breath or posture, not both. The narrow focus often makes the lift/release more obvious.
Comfort-guided practice builds consistency. Adjust freely and let the goal be a calm, repeatable routine rather than perfect form.
Personalized guidance: when to get extra support
This article offers general education for daily comfort and awareness. If you have questions about your specific situation, consider working with a clinician who focuses on pelvic and core care. They can help you tailor positions, breath cues, and progressions to your needs and goals. If any activity brings on discomfort, stop and seek personalized advice before continuing.
You can also browse women’s wellness resources on our site at camchealth.com. If a local program or workshop interests you, save it to your calendar and bring a notebook—written cues often make home routines easier to remember.
Putting it all together
A steady routine can fit into the margins of your day. Start with the warm-up breath, add a few gentle lifts, use simple positions, and keep the effort small. Over time, you’ll refine your sense of timing and coordination. On some days, two minutes will be plenty; on others, you may spend longer exploring variations. That’s the nature of a supportive habit—it bends to your life and keeps working for you.
With breath as your anchor and posture as your friendly guide, pelvic floor practice becomes a calm, repeatable skill. You don’t need perfect conditions, and you don’t need to do everything at once. Choose one cue that resonates, practice it today, and build from there. The routine you keep—even in short bursts—offers the most value.