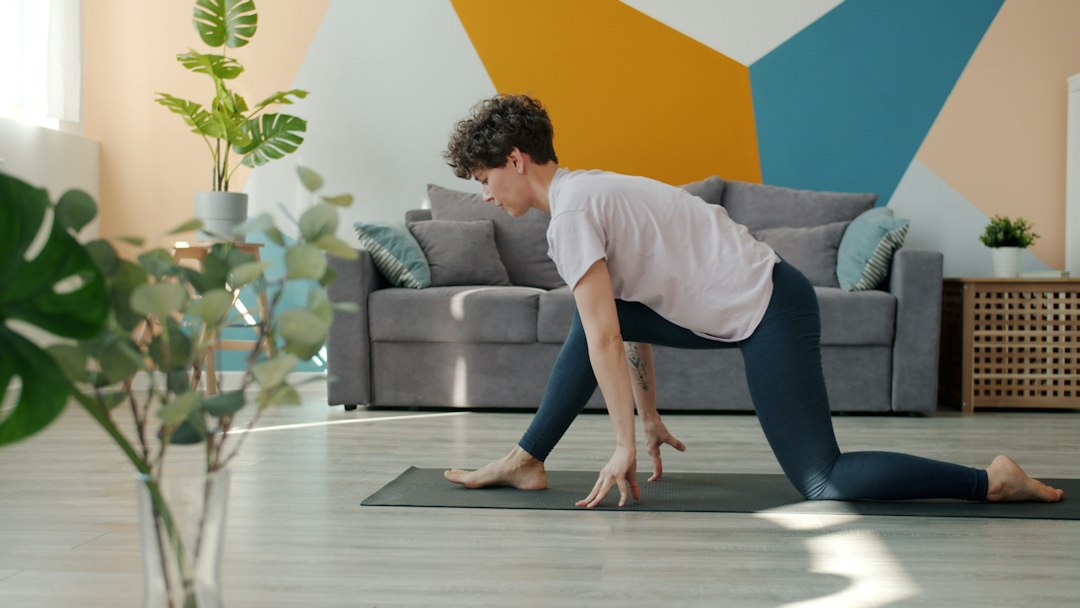
Start now with this 10 minute deep core workout: perform 9 moves for 40 seconds each with 20 seconds rest (see the timer chart), focusing on slow, controlled breathing and a neutral spine—no equipment needed.
Done consistently, 10 minutes can effectively build deep-core strength; use the beginner and wrist-friendly swaps if needed and repeat 3–5 times per week or as a finisher.
Your 10 minute deep core workout: follow-along plan
Here’s the exact 10‑minute structure you can follow today. Set a timer for 40 seconds work and 20 seconds rest. The nine rounds below are ordered to wake up the deep core and then challenge it in different planes, while keeping transitions quick. If side planks are tough on your wrists or shoulders, choose the forearm version or the swaps in the table.
Tip for your phone: open the timer app, use “repeat” intervals if available, or keep this table visible and hit start at each minute mark. You can also screenshot the chart for a printable version.
| Round | Time window | Exercise | Beginner | Intermediate | Advanced | Wrist/shoulder-friendly swap | Key cue |
|---|---|---|---|---|---|---|---|
| 1 | 0:00–1:00 | Diaphragmatic breath activation | Supine knees bent, hands on ribs | Same + longer exhales | 90/90 wall breathing | Always wrist-friendly | Inhale low, long 3–4 s exhale, ribs gently down |
| 2 | 1:00–2:00 | Dead bug | Tap one heel at a time | Alt arm + leg reach | Hold band between hands for tension | Always wrist-friendly | Keep low back quiet on the mat |
| 3 | 2:00–3:00 | Bear plank hold | Knees hover 1–2 in. | Hold steady, breathe | Slow shoulder taps from bear | Forearms on yoga blocks | Knees under hips, ribs knit |
| 4 | 3:00–4:00 | Plank shoulder taps | Hands on bench incline | Regular taps, slow | Feet closer for harder | Forearm plank weight shift | Hips quiet, exhale on tap |
| 5 | 4:00–5:00 | Bent‑leg lift / half crunch | Hands support head | Reach forward on exhale | Arms overhead without rib flare | Same on forearms if neck sensitive | Ribs down, chin stays neutral |
| 6 | 5:00–6:00 | Alternating leg kick‑outs | Shorter range | To 45° with control | To hover, 2–3 s tempo | Heel taps instead | Exhale as leg extends |
| 7 | 6:00–7:00 | Slow bicycle | Hands at temple, tiny range | Slow cross‑body, 3 s each side | Pause 1 s at end range | Dead bug with twist | Lead with ribs, not elbows |
| 8 | 7:00–8:00 | Forearm plank with knee taps | Knees on pad, lift/tap | Full plank, tap knees | Slow 2–1–2 tempo | Incline forearm plank | Lightly tap, don’t drop |
| 9 | 8:00–9:00 | Side plank L/R (split 20/20) | Bent‑knee side plank | Feet stacked | Top‑leg raise or star | Forearm side plank, knees | Lift bottom waist away from floor |
| — | 9:00–10:00 | Breath reset or favorite move | 90/90 breathing | Repeat dead bug | Hold side plank 30/30 | Forearm versions as needed | Finish calm, ribs down |
This fills the full 10 minutes including transitions. Keep the work slow and controlled, and use the swaps whenever your wrists or shoulders want a break.
How to brace and breathe for deep core activation
The “deep core” is a team: the transverse abdominis (TA), internal and external obliques, the pelvic floor, and the small spinal stabilizers like the multifidi. They work with the diaphragm to create support. You’ll get more from every rep if you organize breath, ribs, and pelvis.
- Diaphragmatic inhale: Place one hand on your low ribs and one on your belly. Inhale through the nose and let the ribs widen slightly in all directions. Think 360° air around your waist.
- Long exhale to “wrap”: Exhale through pursed lips for 3–4 seconds. Feel the ribs gently draw down and the low belly “hug” in. That’s your TA responding.
- Neutral spine and pelvis: You don’t need a big tuck. Aim for a small space under the low back in supine moves and a long, stacked spine in planks. If your low back arches, shorten the range or regress.
- Hands-on checks: In supine drills, slide fingers just inside the front hip bones. On a long exhale, you should feel a gentle tension under your fingertips (not a hard push out).
- Pelvic-floor friendly cues: Think “lift the hammock” softly as you exhale, especially in crunch patterns. The goal is gentle support, not max squeeze.
- Quality first: When breath and control start to fade, reduce the lever length, slow your tempo, or choose the beginner version for the next set.
If you want a deeper dive into daily core support, see our practical guide to pelvic floor care: Women’s pelvic floor exercises: practical guide.
Move-by-move guide with cues and swaps
1) Diaphragmatic breath activation
Setup: Lie on your back, knees bent, feet flat. One hand on ribs, one on belly. Inhale softly, then exhale long through pursed lips, feeling ribs descend.
Do it right: No chest heaving, no belly forcing up. Aim for quiet, smooth breaths. Two to three full breath cycles typically fill the 40 seconds.
Swaps and levels: Everyone uses this as written. To progress, elevate feet to 90/90 at a wall for more rib control.
2) Dead bug
Setup: On your back, arms above shoulders, hips and knees at 90/90. Flatten nothing; keep a small natural space under the low back.
Cues: Exhale to reach opposite arm and leg away. Pause, inhale to return. If the low back lifts, shorten your leg reach.
Levels: Beginners tap a heel only. Intermediate alternate full reach. Advanced hold light tension on a mini band between hands. Wrist-friendly by nature.
3) Bear plank hold
Setup: Hands under shoulders, knees under hips. Lift knees 1–2 inches off the floor.
Cues: Think “press the floor away” and “zip the ribs.” Keep breath steady. If shoulders feel jammed, place hands on yoga blocks or a low step.
Levels: Beginners hold still. Intermediate add small hover marches. Advanced add slow shoulder taps from the bear position.
4) Plank shoulder taps
Setup: High plank, hands under shoulders, feet wider than hips for stability.
Cues: Move slowly. Exhale as you tap, minimize hip sway. If your wrists get cranky, switch to forearm plank weight shifts.
Levels: Beginners elevate hands on a bench or couch. Intermediate tap at a calm tempo. Advanced bring feet closer or add a 2‑second pause at each tap.
5) Bent‑leg lift / half crunch
Setup: Supine, knees bent, fingertips behind head for light support.
Cues: Exhale to float shoulder blades just off the floor while knees lift a few inches, reaching hands forward if you remove head support. Keep chin neutral and ribs down.
Levels: Beginners keep hands supporting the head. Intermediate reach forward on each exhale. Advanced reach arms overhead without letting ribs pop.
6) Alternating leg kick‑outs
Setup: Supine 90/90. Hands can rest beside you.
Cues: Exhale to extend one leg, inhale to return. Only go as low as you can while the low back stays quiet. Slow tempo makes this harder than big range.
Levels: Beginners keep the kick‑out short or swap to heel taps. Intermediate extend to about 45°. Advanced extend to a hover with a 2–3 second exhale.
7) Slow bicycle
Setup: Supine. Hands lightly at temples, elbows in your peripheral vision.
Cues: Exhale and rotate ribs toward the opposite knee. Move in slow motion, three seconds per side. Think ribs driving the twist, not elbows yanking the neck.
Levels: Beginners keep a tiny range. Intermediate stick to the 3‑second tempo. Advanced pause one second at the end of each twist.
8) Forearm plank with knee taps
Setup: Forearms parallel, shoulders over elbows, legs long.
Cues: From a solid plank, lightly tap one knee, then the other, maintaining a long line from head to heels. Exhale on each tap. Tap softly rather than “dropping” the knee.
Levels: Beginners can keep knees on a pad and practice gentle lifts. Intermediate full plank knee taps. Advanced use a slow 2‑1‑2 tempo per tap.
9) Side plank L/R
Setup: Forearm under shoulder. Hips stacked. Press the floor away and lift the underside of the waist.
Cues: Split the 40 seconds into 20 and 20. Keep the neck long and the top hip stacked. If you feel shoulder stress, bend the knees or place forearm on a low step.
Levels: Beginners bent‑knee side plank. Intermediate feet stacked. Advanced add a top‑leg raise or star.
Level swap table by exercise
| Exercise | Goal muscle/skill | Beginner regression | Intermediate default | Advanced progression | Optional equipment |
|---|---|---|---|---|---|
| Dead bug | TA control + anti‑arch | Heel taps | Opposite arm/leg reach | Band tension between hands | Mini band |
| Bear plank | Reflexive brace + scapular press | Short holds | Steady 40 s | Hover marches or taps | Yoga blocks for hands |
| Plank taps | Anti‑rotation | Incline plank | Slow taps | Feet closer, pause | Bench or step |
| Half crunch | Rib control + flexion tolerance | Head supported | Reach forward | Arms overhead | Pilates ball under head (optional) |
| Leg kick‑outs | Low‑back quiet with moving legs | Heel taps | Kick to 45° | Hover with slow tempo | None |
| Slow bicycle | Rotational control | Tiny range twist | 3 s per side | 1 s pause at end range | None |
| Forearm plank knee taps | Anterior core + breathing under load | Knees down lifts | Tap knees lightly | Slow 2–1–2 tempo | Pad or mat for knees |
| Side plank | Lateral chain + anti‑side bend | Bent‑knee | Feet stacked | Star/top‑leg raise | Yoga block for forearm |
Is 10 minutes enough? How to program it in your week
Yes—10 minutes can be plenty to train deep‑core coordination and stamina when you focus on control instead of speed. You’re building the ability to resist unwanted motion while you breathe and move. That carries over to lifts, running, and daily life.
- Frequency: 3–5 sessions per week works well for most people. Use it as a short standalone session or a finisher after strength or cardio.
- Progression over 4 weeks: Start with the beginner defaults. Each week, increase either range (while keeping the low back quiet), or the time under tension by slowing the exhale, or upgrade one move to the next level. You can also reduce rest to 15 seconds on a couple of rounds.
- Daily? You can do a light version daily if you rotate intensity. For example, Mon/Wed/Fri = full 10 minutes; Tue/Thu = 6‑minute easy mobility + breath work only.
- Pairing with training: On strength days, place this after your lifts. On conditioning days, do it first to grease good mechanics.
If you’re starting a broader program, these guides pair well with this core routine: Strength Training for Beginners and The Complete Low‑Impact Workout Plan.
60‑second warm‑up and 60‑second cool‑down
Short prep is enough to switch your core “on.” Do this quick warm‑up before you press start:
- Rib‑cage breathing, 2 cycles: Inhale wide, long exhale to set ribs down.
- Cat‑cow x 4 reps: Move slow, stop where you feel a gentle stretch.
- Marching bridge x 4 per side: Small hip lift, march without hips rocking.
Cool down in a minute:
- Child’s pose, 3 breaths: Reach long, exhale into the back ribs.
- Supine twist, 2 breaths per side: Only as far as ribs stay down.
- 90/90 breathing, 2 breaths: Feet on wall, long exhales to settle.
Why it works: A short warm‑up calms the rib cage and hips so your deep core can coordinate without fighting stiffness. The cool‑down brings your breath back down and helps you carry good posture into the rest of your day.
Troubleshooting: common mistakes and quick fixes
Use this quick self‑check during and after a set. If you catch one of these, down‑shift and keep quality high.
- Breath cadence: If you’re rushing or holding your breath, slow down. Think 3–4 s exhale, soft 2 s inhale.
- Rib and pelvis position: Ribs flaring up or pelvis dumping? Exhale and knit ribs down; shorten the lever (bend knees or raise legs higher).
- Low‑back contact (supine): If your low back lifts on dead bug or kick‑outs, reduce the leg range until the mat contact feels quiet and steady.
- Hip alignment (planks): Hips sagging or hiking? Widen your stance, gently squeeze your glutes, and imagine a glass of water on your low back.
- Neck alignment: If your neck works harder than your abs in crunch patterns, look slightly up, keep space under your chin, and support your head with hands.
- Tempo control: If the set feels easy, don’t go faster—move slower and add a 1‑second pause at the hardest point.
- Discomfort triggers: Sharp or pinching sensations are your cue to switch to the easier version, use a pad, or skip that move today.
For more ab‑training options that emphasize form and variety, check out Strengthen Your Core with the Best Ab Workouts. And if you train at home, these tips help you set up a safe space: Stay Safe While Working Out at Home.
No equipment vs. light equipment options
You don’t need gear for this session, but small tools can shift the challenge without slowing you down:
- Mini band: Hold it between the hands in dead bug to cue rib position and add anti‑rotation work.
- Pilates ball: Place under the head for half crunches if your neck is sensitive, or between knees to add adductor tension in kick‑outs.
- Light dumbbell: Hold above the chest in dead bug to encourage ribs down. Keep it light so breathing stays comfortable.
- Yoga blocks or a low step: Elevate hands for bear and plank swaps if wrists feel better at an incline.
Keep transitions minimal by setting any tool within arm’s reach before you begin. If equipment adds confusion, go back to bodyweight—control matters more than load here.
Track your progress in 4 minutes per week
A simple test‑retest plan shows your core is getting more reliable, not just more tired.
- Baseline A: Quality forearm plank up to 90 seconds. Stop the moment your hips sag or breath gets choppy. Record the best clean time.
- Baseline B: Dead bug reps in 60 seconds. Only count reps where your low back stays quiet and the reach is controlled.
Weekly log template (takes 2 minutes):
- Date
- Moves completed (versions used)
- Perceived difficulty 1–10 (should land around 6–7 for most sets)
- Any notes: where you felt it, what you swapped
Retest at week 2 and week 4. If your clean plank time improves or your dead bug reps go up while quality stays high, bump one move to the next level or reduce rest to 15 seconds on two rounds.
Want a broader routine to pair with this? Start here: Beginner Strength Training Plan for Busy Adults and our Low‑Impact Cardio Workouts guide.
Stick to the plan, keep your reps honest, and your core will feel more responsive in the lifts, runs, and routines you already do.